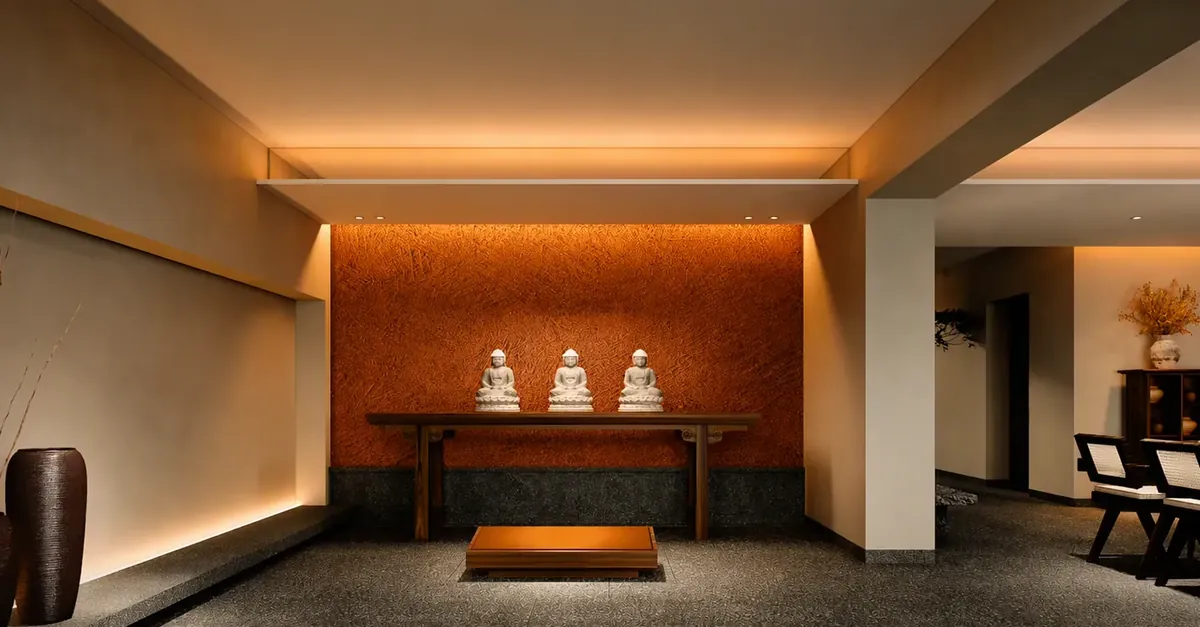
Image: in-house design rendering, shown as a visual reference.
Quick answer
TL;DR: A productive hospitality furniture brief starts with the room or zone, then records use, working dimensions, quantity direction, visual references, material status and open decisions. Treat drawings and renderings as alignment tools rather than final production proof. Keep confirmed details separate from working directions, identify the next approval owner and prepare a clear handoff. This gives designers, buyers and factory partners one shared starting point without forcing incomplete information into a final specification.
Brief fields to make visible: room or zone, intended use, working dimensions, quantity direction, visual language, material status, drawing or rendering need, handoff questions and open decisions.
Key conclusions
- Start with the application, not only the product name.
- Label working dimensions and quantity direction clearly.
- Separate confirmed materials from directional references.
- Use drawings and renderings to align proportion and placement.
- Record status and approval ownership before handoff.
A hospitality furniture brief should make five things visible: where the piece will be used, what it needs to do, how large it needs to be, which visual direction it should follow and which decisions are still open.
The room gives the supplier context for proportion, movement, viewing distance and relationship with adjacent elements.
A working dimension is useful when it is labelled as a working range rather than presented as a false final measurement.
Design drawings and visual renderings are communication tools for proportion, placement, palette and spatial relationship, not automatic proof of final production details.
A useful handoff identifies what is confirmed, what is a working direction, what is an open question and who owns the next decision.
A hospitality furniture request often starts with a reference image and a target room. That is useful, but it is rarely enough for a productive supplier review.
A project furniture brief should make five things visible: where the piece will be used, what it needs to do, how large it needs to be, which visual direction it should follow and which decisions are still open.
The goal is not to turn a design conversation into a rigid form. The goal is to give every person in the project a shared starting point.
Start with the room, not the product name
A bedside unit, console, occasional table, lounge chair or storage piece can serve different purposes in different spaces. Begin with the room or zone: guest room, suite, lobby, restaurant, corridor, meeting room, reception area or another defined application.
Include a room photograph, elevation, plan or reference image when available. The room gives the supplier context for proportion, movement, viewing distance, cleaning questions and relationship with adjacent elements. It also helps separate a furniture reference from a final product specification.
A product name on its own rarely tells the whole story. The same visual direction may need a different review in a guest room than in a lobby. The space determines which questions should come first.
Share working dimensions and quantity direction
The first dimensions do not need to be final. A working range is still useful if it is labelled as a working range. Include width, height, depth, clearance or another dimension that affects the room or the way the furniture will be used.
Quantity direction matters too. One piece for a visual test and a repeated set for multiple rooms create different review questions. A hospitality project may need room types, zone names, a repeat logic or a simple quantity schedule so the team can see what should stay consistent and what can vary.
If the dimensions are still being coordinated with a designer, say so. A clear working dimension is more useful than a false final dimension that later creates confusion.
Explain the visual language
Reference images should answer a visual question. They may show proportion, material contrast, edge treatment, hardware direction, palette or relationship with the room. One image rarely answers all of these questions, so a small group of focused references is usually more useful than a large unsorted folder.
If the project has wall art, flooring, lighting or millwork already selected, include those references when they affect the furniture direction. Coordinated does not mean identical. It means the project team can see what should stay consistent and what may change by zone.
For example, a hotel may want a repeated visual rhythm across several room types while allowing a different scale in the lobby. An office may want one material language across reception and meeting spaces while allowing different furniture functions. A villa may want a connected palette across rooms without making every piece look the same.
Separate confirmed materials from material direction
A brief may say "warm wood direction," "dark metal tone," "stone-like surface" or "textile in a muted palette" before the final material is chosen. That is acceptable when the wording is clear about its status.
Avoid turning a material shown in an image into a universal specification without confirmation. Each item should have its own record for material, surface, structure, hardware and finish. The review should show what is visible, what is confirmed and what still needs a sample, drawing or production discussion.
This distinction protects both sides of the conversation. The buyer can keep the intended visual language visible, while the supplier does not have to pretend that an unconfirmed detail is already fixed.
Use drawings and renderings for alignment
Design drawings and visual renderings can help the team review proportion, placement, palette and spatial relationship before the next decision. They should be treated as communication tools, not as proof that production details are already final.
A practical sequence is:
- Share the design brief.
- Review the application.
- Develop design references.
- Confirm materials and finish direction.
- Coordinate the project handoff.
This sequence gives the designer, buyer and factory partner a shared record without forcing incomplete information into a final specification.
The drawing answers a visual question. The product record answers a scope question. The project brief connects the two.
Prepare the procurement handoff
Before the project moves forward, gather the reference number, room or zone, quantity direction, working dimensions, material status, finish status, drawing reference, packaging questions and owner for each open decision.
The aim is not to create paperwork for its own sake. It is to prevent a late question from being mistaken for a production defect or a scope change from being mistaken for a supplier failure.
A handoff becomes more useful when it identifies the status of each field. Use labels such as confirmed, working direction, open question and not applicable. This makes the next conversation faster because the team can focus on the fields that actually need a decision.
Keep categories connected but separate
Furniture may be coordinated with wall art, craft, lighting, flooring or millwork. Coordination means that the items share a project direction. It does not mean that every category has identical production fields.
Furniture should retain its own record for dimensions, structure, materials, finish and handoff. Wall art should retain its own record for wall size, subject, surface, frame and installation context. Craft should retain its own record for placement, scale, mounting or freestanding use, material and process evidence.
Separate records make a shared visual direction easier to manage. They also give procurement teams a clearer path when one category is ready for review while another still has open questions.
A short briefing template
A useful first message can include:
- project type and location
- room or zone
- intended use
- approximate dimensions
- quantity direction
- reference images
- material or finish direction
- need for drawings or visual renderings
- packaging or handoff questions
- open decisions and decision owner
A custom furniture project does not need every answer on day one. It needs the next answer to be visible.
The best briefs are not necessarily the longest. They are the ones that allow the next person to understand what is known, what is flexible and what needs evidence.
Questions to ask before the next review
Before sending the brief, ask:
- Is the application clear?
- Are the working dimensions labelled as working dimensions?
- Is the quantity direction visible?
- Are reference images grouped by purpose?
- Are material terms confirmed or still directional?
- Is a drawing or rendering needed for the next decision?
- Does the team know who approves the next step?
- Are packaging and handoff questions recorded?
These questions are simple, but they prevent a common problem: a request appears complete because it contains a photograph, while the actual project decisions remain hidden.
Closing thought
A hospitality furniture project becomes easier to discuss when the room, the use, the visual direction and the open decisions are visible together.
For a project discussion, share the brief, the room context and the reference direction first. The remaining details can then be separated into confirmed items, adjustable items and questions requiring review.
A custom furniture workflow does not begin by pretending that every decision is final. It begins by making the next decision easy to see.
Next step: Share a furniture project brief with Qitong Arts for review.
Add the project zones before discussing a collection
A hospitality brief becomes easier to review when the project is divided into zones. The zone may be a guest room type, a lobby area, a restaurant section, a corridor, a meeting space or another location that has a different role in the interior.
The zone name does not need to be complicated. A short label, a reference image and a working quantity direction can be enough to start. What matters is that the team can connect a furniture reference to a place and a use.
A single collection name can hide too much. A console in a lobby may need a different scale and clearance from a bedside piece in a guest room. A lounge chair in a reading area may need a different upholstery or maintenance discussion from a chair used in a restaurant. The project record should make those differences visible.
When zones are clear, the team can also decide what should repeat and what can change. Repetition may apply to silhouette, palette, hardware direction or another visual element. Variation may apply to size, function, configuration or placement. That distinction is often more useful than asking whether every piece should be identical.
Record the approval path
Furniture decisions rarely belong to one person. A designer may lead the visual direction, a procurement team may coordinate the commercial handoff, a contractor may need installation information and a project owner may approve the final scope.
A short brief should identify the next approval owner. It can also record which items need a drawing, which need a material review and which need a separate discussion. This avoids a common delay: a supplier answers one question while the project team is waiting for a different person to approve the next step.
The approval path can be recorded with simple status labels:
- visual direction to review
- dimensions to confirm
- material direction open
- drawing requested
- project scope under review
- handoff information pending
These labels are not a promise of a fixed workflow for every project. They are a practical way to show what the team knows and what it needs to decide next.
Use a reference set with a purpose
A large image folder can make a project feel well researched while still leaving the supplier unsure about the actual direction. A smaller reference set is often stronger when every image has a role.
One image may show proportion. Another may show a surface direction. A third may show the relationship between the furniture and the room. A fourth may show a palette or a hardware detail. Label the role of each image when possible.
The same rule applies to design drawings and visual renderings. A drawing may explain the form. A rendering may explain the placement. A room photograph may explain the surrounding context. Keeping those roles separate makes the discussion easier to follow.
This is especially important when a design image is used to begin a furniture conversation. A visual reference can be persuasive, but the team still needs to confirm which details are intended and which details are only part of the reference atmosphere.
Review the furniture and the room together
Furniture should not be reviewed as if it exists outside the room. The project team may need to discuss circulation, clearances, lighting, wall art, flooring, millwork, doors, windows and nearby equipment.
The first review does not need a complete architectural package. It does need enough context to prevent an isolated product image from carrying decisions that belong to the wider space.
For a hospitality project, room function may affect the review. For a commercial project, traffic and shared use may matter. For a residential project, the owner may care about continuity between rooms and a more personal material direction. The page or brief should not assume that one application rule fits all projects.
A clear room context also helps the design team decide whether a piece should be treated as a focal element, a supporting piece or part of a repeated package. That decision influences how the reference should be reviewed and what information needs to be confirmed next.
Keep change decisions visible
Custom projects develop through review. A proportion may change after the room is measured. A material direction may change after a sample is considered. A quantity may change after the project owner confirms the zones. These changes are normal, but they become difficult when the record does not show what changed.
A simple revision note can protect the project conversation. Record the date, the field that changed, the current direction and the person who requested the change. The note does not need to become a complicated document. It needs to prevent an old image or old dimension from being mistaken for the current direction.
For a multi-room project, revision discipline also helps separate one zone from another. A change in a lobby does not automatically change the guest room package. A change in one reference image does not automatically change every material decision. Clear records give the project room to develop without losing its history.
Discuss samples and visual checks carefully
A sample or visual check can answer a specific question. It may help the team review a colour direction, surface appearance, scale, frame or material relationship. It should not be presented as evidence for details that have not been checked.
Before asking for a sample or visual, state the question it needs to answer. This keeps the review focused. It also helps the project team decide whether a digital reference is enough for the current stage or whether a physical confirmation is required.
The final requirement depends on the project and the item. A design rendering may be useful before material selection. A material sample may be useful before a final finish discussion. A packaging or handoff review may be useful before the project moves to delivery coordination. The brief should identify the decision, not assume that one evidence type solves every question.
Plan the handoff before the last minute
A project handoff is easier when the information is collected during the review rather than at the end. The handoff may include reference numbers, room or zone, quantity direction, working dimensions, material status, finish status, drawing reference, open questions and packaging notes.
The receiving team should be able to tell which information is final, which is a working direction and which still needs approval. If a field is not relevant, mark it as not applicable rather than leaving it blank.
This discipline helps designers, procurement teams, contractors and production partners discuss the same scope. It also makes it easier to identify the next question when a project returns after a pause.
A practical first message
A first message to a custom furniture supplier can remain short:
We are reviewing furniture for a hospitality project. The first application is [room or zone]. The working dimensions are [range]. The quantity direction is [range or room types]. The visual direction is attached. The current material direction is [confirmed or open]. We need [drawing, rendering, material review or project discussion] as the next step. The open decisions are [list].
This message does not pretend that the project is complete. It gives the supplier enough context to respond with the next useful question.
Questions for a design review meeting
A short review meeting can use the following questions:
- Does the reference fit the room function?
- Which dimensions are fixed and which are working?
- What should repeat across zones?
- What may vary by room type?
- Which visual elements are essential?
- Which material terms are confirmed?
- Which details need a drawing or rendering?
- Who approves the next change?
- What must be recorded for procurement?
- What is still unknown and should not be presented as a fixed claim?
These questions keep the meeting connected to the project instead of turning it into a general discussion about furniture images.
Why a compact brief often works better
A brief can become long because it repeats descriptions rather than clarifying decisions. A compact brief does the opposite. It gives each field one purpose and marks the status of that field.
The most efficient brief is not the one with the fewest words. It is the one that reduces unnecessary interpretation. A room label, a working dimension, a quantity direction and a visual reference may save more time than several paragraphs of general product description.
The brief should also remain honest about what has not been confirmed. A project can be advanced without turning every open question into a marketing statement. That is useful for both the buyer and the supplier because the conversation stays connected to the actual project stage.
Closing thought
A hospitality furniture project becomes easier to discuss when the room, the use, the visual direction and the open decisions are visible together.
For a project discussion, share the brief, the room context and the reference direction first. The remaining details can then be separated into confirmed items, adjustable items and questions requiring review.
A custom furniture workflow does not begin by pretending that every decision is final. It begins by making the next decision easy to see.
Next step: Share a furniture project brief with Qitong Arts for review.
FAQ
What should a custom furniture brief for a hospitality project include?
A project furniture brief should make five things visible: where the piece will be used, what it needs to do, how large it needs to be, which visual direction it should follow and which decisions are still open. Starting with the room or zone rather than a product name gives the supplier context for proportion, movement and viewing distance. It also separates a furniture reference from a final product specification.
Should I send final dimensions in a first furniture brief?
Not necessarily. A working range is still useful if it is labelled as a working range. Include width, height, depth or clearance that affects the room. If the dimensions are still being coordinated with a designer, say so. A clear working dimension is more useful than a false final dimension that later creates confusion.
How do I share material direction before the final material is chosen?
A brief may say a warm wood direction, a dark metal tone or a textile in a muted palette before the final material is chosen, as long as the wording is clear about its status. Avoid turning a material shown in an image into a universal specification without confirmation. Each item should have its own record for material, surface, structure, hardware and finish.
How should design drawings and renderings be used in a furniture brief?
Design drawings and visual renderings help the team review proportion, placement, palette and spatial relationship before the next decision. They should be treated as communication tools, not as proof that production details are already final. A practical sequence is to share the brief, review the application, develop references, confirm material direction and coordinate the handoff.
How do I keep furniture, wall art and craft coordinated but separate?
Coordination means the items share a project direction. It does not mean every category has identical production fields. Furniture retains its own record for dimensions, structure, materials, finish and handoff. Wall art and craft each keep their own records. Separate records make a shared visual direction easier to manage and give procurement a clearer path.